Labels serve multiple purposes. Some of the most common are the following:
- Organize test cases into subsets for execution
- Exclude subsets of test cases from being executed
- Allow PMs to assign cases (with empty rules) to team members
- Filter cases by label
Having the option to add/remove labels to multiple test cases at the same time now makes it much easier to apply labels however you desire.
Adding Labels
To add labels, follow the steps below.
Step 1: Go to the Test Cases section.
Step 2: Use search filters to display the test cases that will have the label applied (Recommended).
Step 3: Click Select multiple to display the option to select only the (up to) 10 cases displayed on the page or to select all the cases that fit the scope of the search, then select the option of your choice.

It is also possible to select cases individually. The cases selected will remain selected when flipping through the pagination.
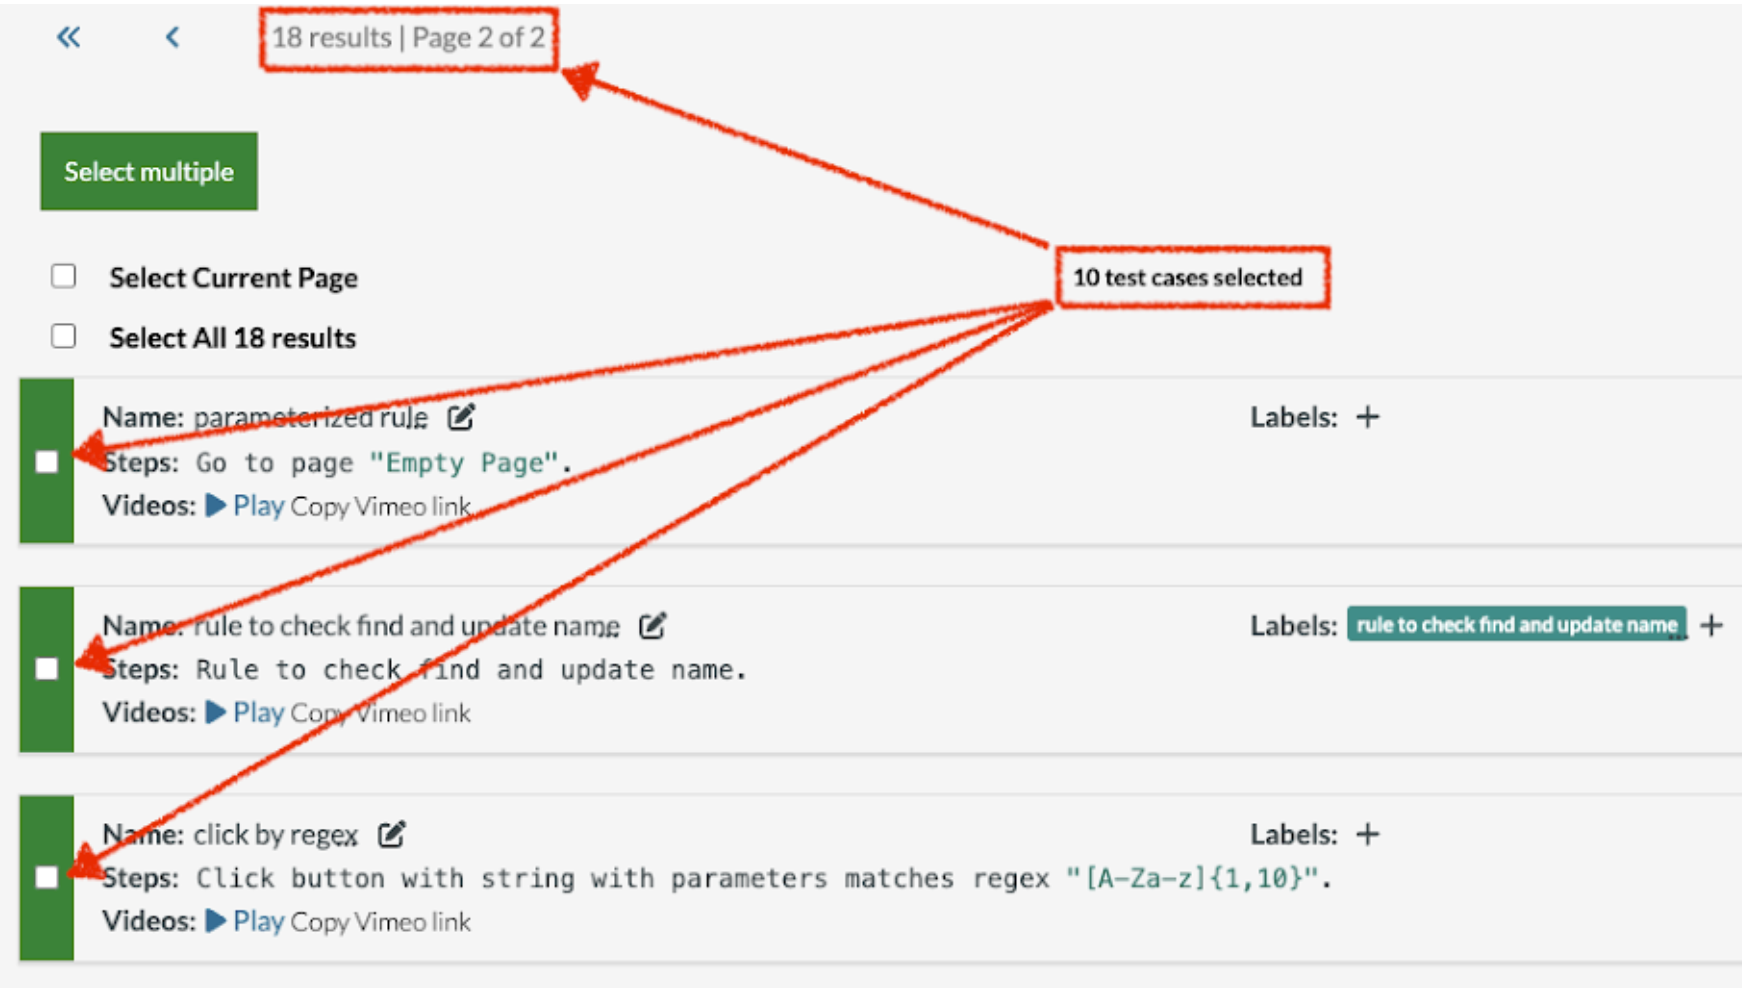
Caption: In the image above, all 10 of the cases from page 1 have been selected and the user has moved to page 2, where none of the cases have been selected.
Edit Labels
Step 4 (Alternative 1): Click the Edit labels button.

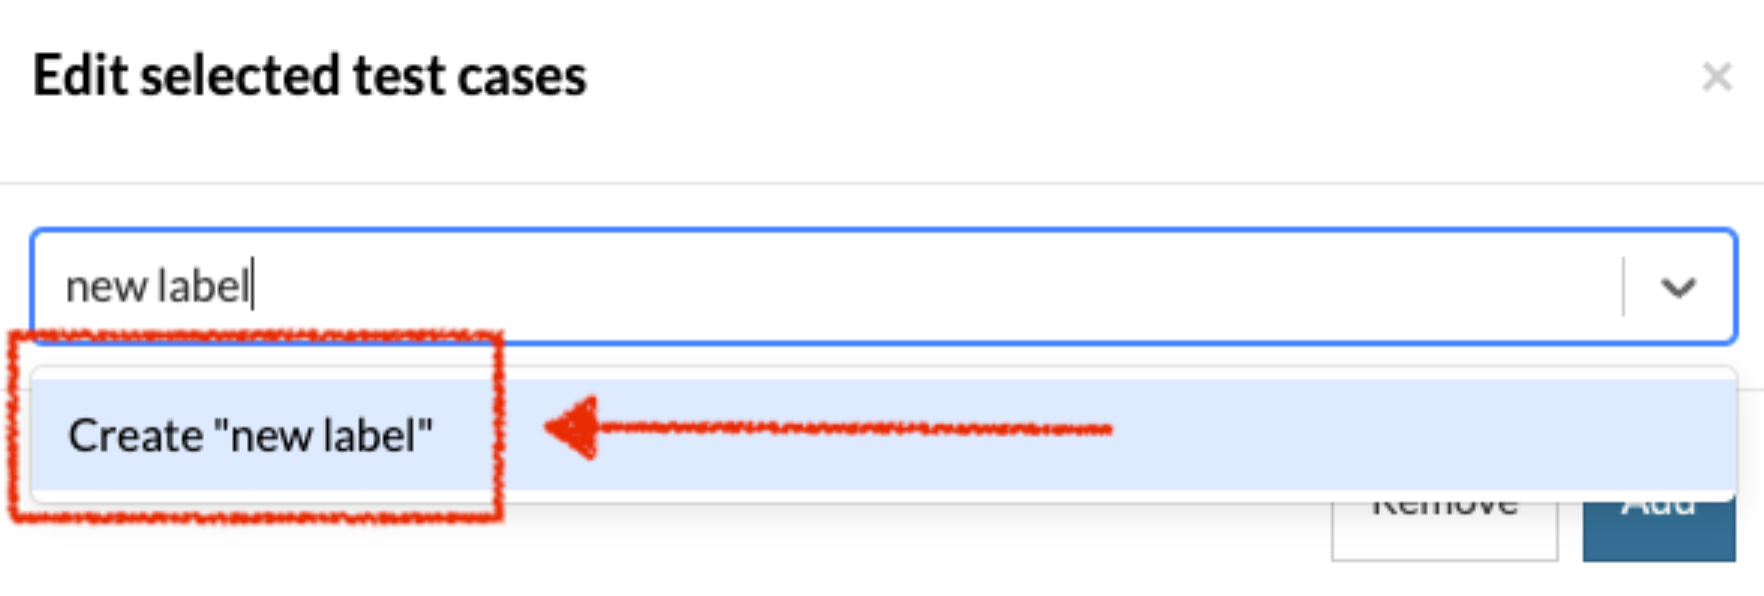
Then type the new label name into the Add or pick labels ... field, click the option Create "new label" from the dropdown, and click Add.
Step 4 (Alternative 2): Click the + button on the right of the Label field in any one of selected test cases, type the desired label name, and press the Enter key or click anywhere on the screen outside the label field.

When testRigor asks whether to apply the label to all selected test cases, click Apply to all selected.

Remove Labels
To remove labels in bulk, select the desired test cases and click the x on the right of the undesired label.

Alternatively, select the desired test cases and click the Edit labels button. Then, click the Add or pick labels ... dropdown to display existing labels. Lastly, select the option with the unwanted label and click Remove.

Was this article helpful?
That’s Great!
Thank you for your feedback
Sorry! We couldn't be helpful
Thank you for your feedback
Feedback sent
We appreciate your effort and will try to fix the article